Here’s a complete guide on how to install and run UltraPixel on ComfyUI. This guide is specifically for those who find the GitHub installation process confusing or are having trouble after installing.

Let’s start with the overview what is ComfyUI-UltraPixel
ComfyUI-UltraPixel was developed using the original code from UltraPixel. The current implementation is essentially a ‘modified wrapper’ around the original UltraPixel code.
This process may take some time due to recent significant life events that require attention.
As of July 17th, ComfyUI-UltraPixel supports the following GPU configurations:
- 10GB GPUs: Up to approximately 2048×2048 resolution for text-to-image and ControlNet.
- 12GB GPUs: Up to approximately 3072×3072 resolution for text-to-image and ControlNet.
- 16GB GPUs: Up to approximately 4096×4096 resolution for text-to-image and 3840×4096 for ControlNet.
NOTE: Make sure to choose the resolution according to the GPU you have otherwise the process will be much slower or may halt your computer.
Follow the Steps to Install UltraPixel ComfyUI
- You have a option to install directly from Install Missing Custom Nodes in ComfyUI, But i encountered issue even after the installation was complete and restarted ComfyUI, there was no comfyUI>Models>Ultrapixel directory there.

2. You can manually create a new folder and rename it to ultrapixel in ComfyUI>Models directory
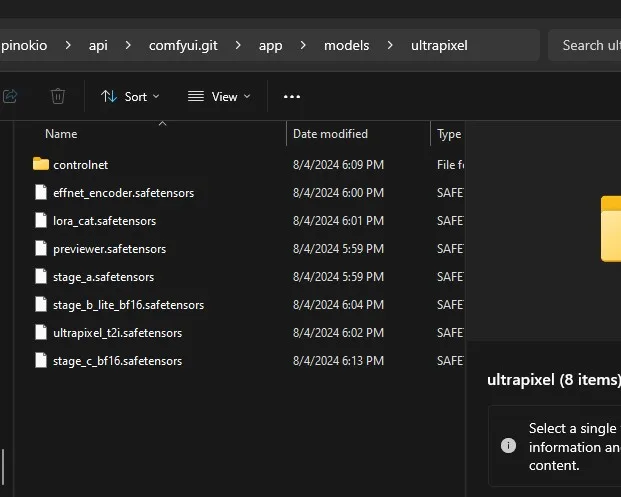
- Now download all the required files in this folder from models_checklist.txt
- Make a folder of controlnet inside ultrapixel folder just shown in the image above, once you have created a folder now download canny.safetensors file from here
- Make sure to place all the files exactly where they shown in the folder Image above.
3. Download workflow default and workflow controlnet .json files

4. Open the default workflow in ComfyUI it will be exactly the same like the image below only the Preview Image will be empty.
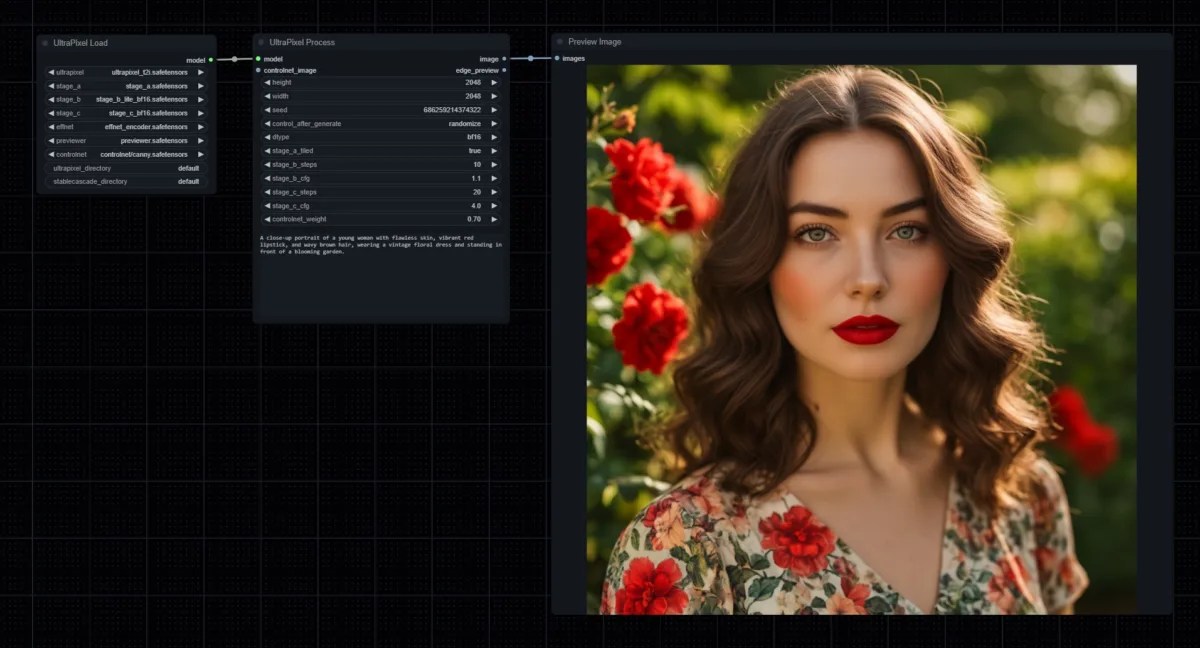
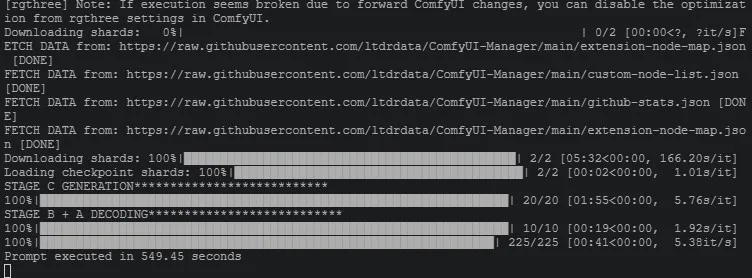
5. Once you click on ‘Queue Prompt’, it will download the models, may take sometime be patient (depands on your internet speed)
6. Example Output for prompt: “A close-up portrait of a young woman with flawless skin, vibrant red lipstick, and wavy brown hair, wearing a vintage floral dress and standing in front of a blooming garden.”

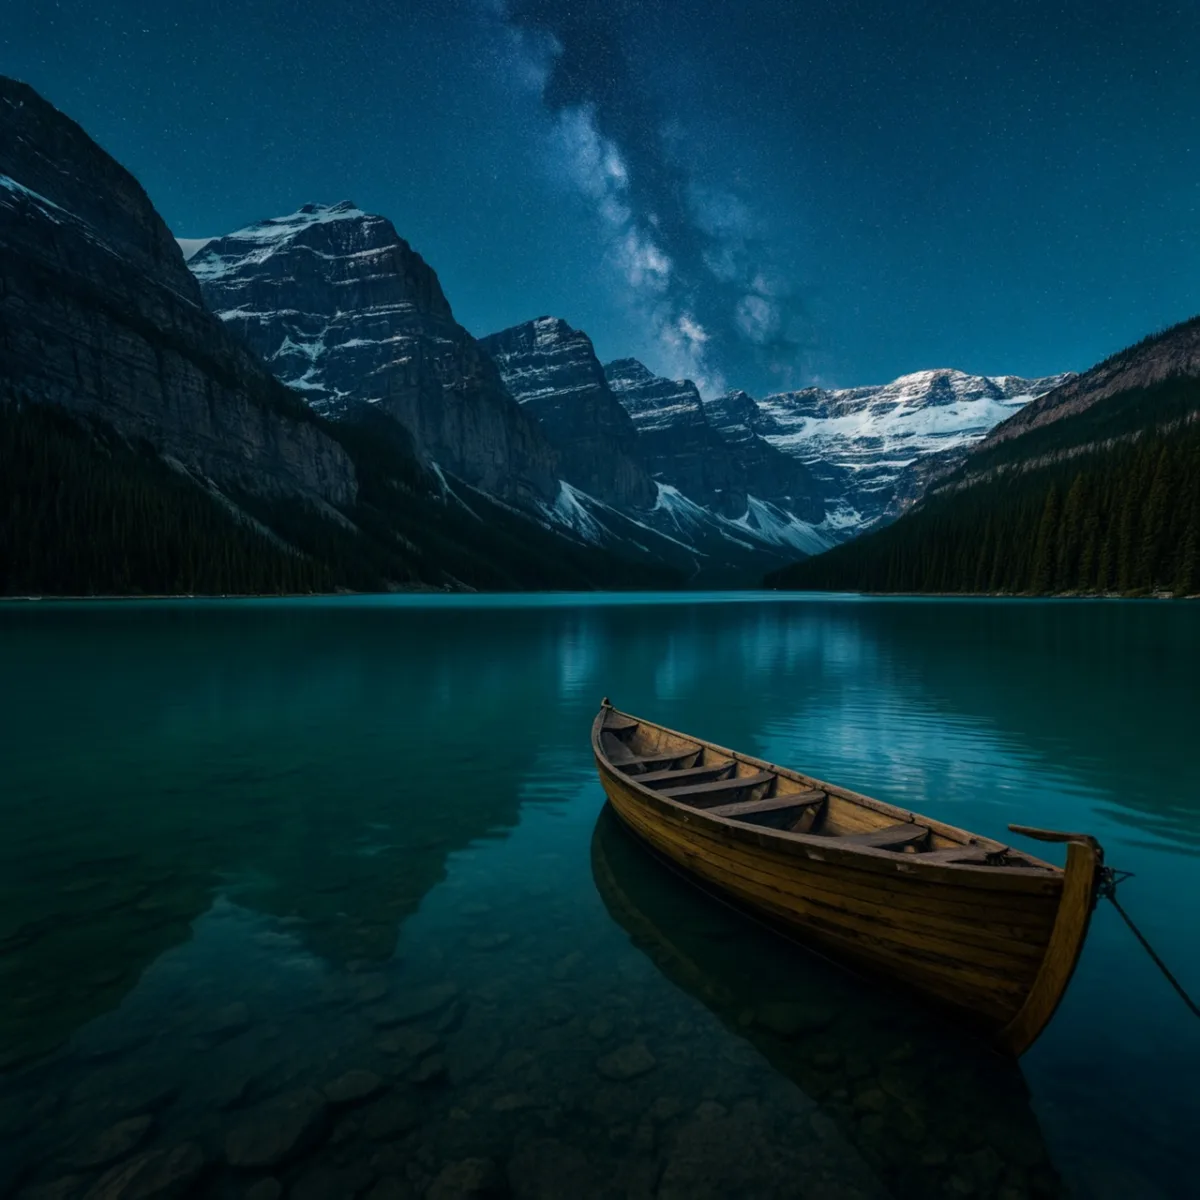
Another Prompt: A highly detailed, high-quality image of the Banff National Park in Canada. The turquoise waters of Lake Louise are surrounded by snow-capped mountains and dense pine forests. A wooden canoe is docked at the edge of the lake. The sky is a clear night time, milky way, stars visible, and the air is crisp and fresh.
Here is the complete information in a PDF to help you understand everything about UltraPixel.
A special thanks to the UltraPixel team for their incredible work.
Previously, we published a step-by-step guide on installing and using Flux AI on ComfyUI. The results from this guide have produced the most stunning AI-generated images, surpassing SD3 Medium.
If you have any questions, comments or suggestion, please share them in the comment section below. We frequently check and respond to queries as quickly as possible.
Follow us on social media platforms and Stay updated with the latest news by joining the INCPak WhatsApp Channel


